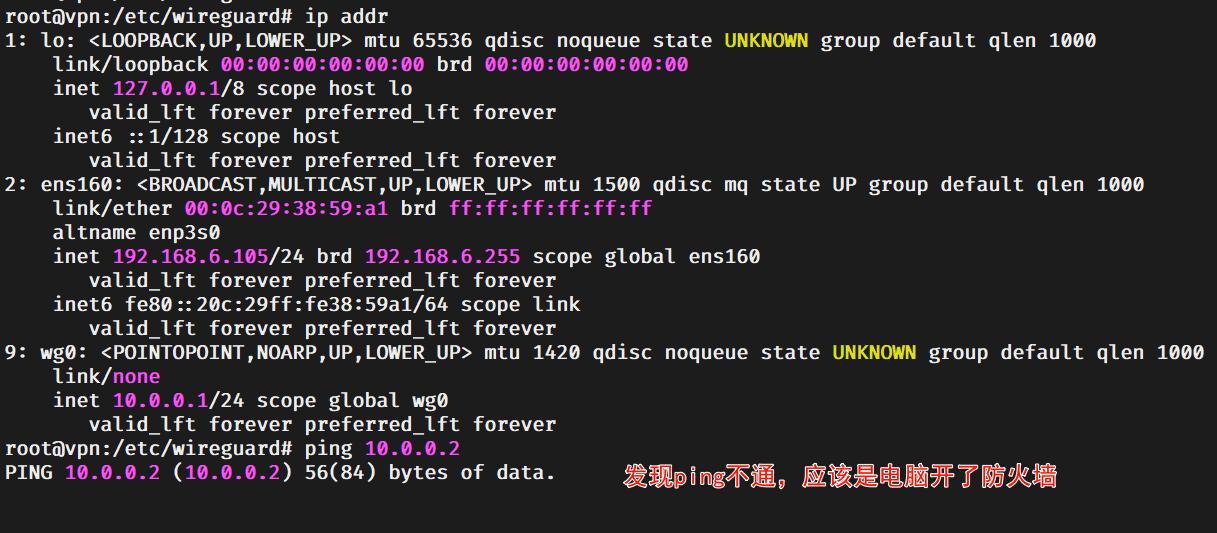
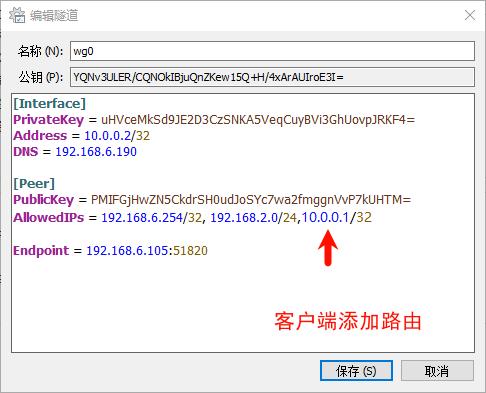
一、项目准备
1.1、VMware ESXi
1.2、Ubuntu镜像
1.3、WireGuard客户端
1.4、SSH工具
1.4.1、MobaXterm激活
二、部署Ubuntu
Ubuntu系统在VMware ESXi中安装设置请参考 Ubuntu搭建OpenVPN配置分流规则指南!第二步)
三、安装WireGuard
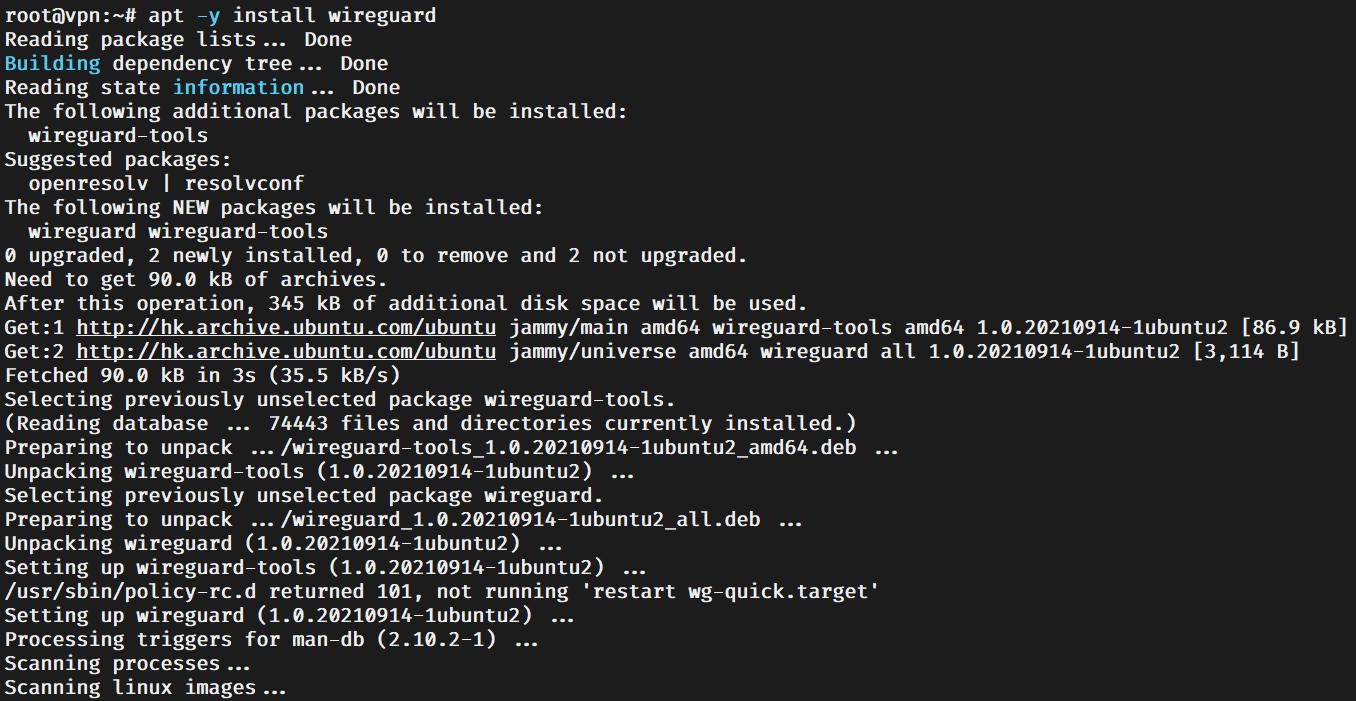
3.1、安装
apt -y install wireguard
3.2、进入WireGurad文件夹
cd /etc/wireguard/ && ll

3.3、设置新建文件或目录的默认权限
umask 077
3.4、为服务器生成私钥
wg genkey | tee /etc/wireguard/server.key

3.5、为服务器生成公钥
cat /etc/wireguard/server.key | wg pubkey | tee /etc/wireguard/server.pub

3.6、为客户端生成私钥
wg genkey | tee /etc/wireguard/client.key

3.7、为客户端生成公钥
cat /etc/wireguard/client.key | wg pubkey | tee /etc/wireguard/client.pub

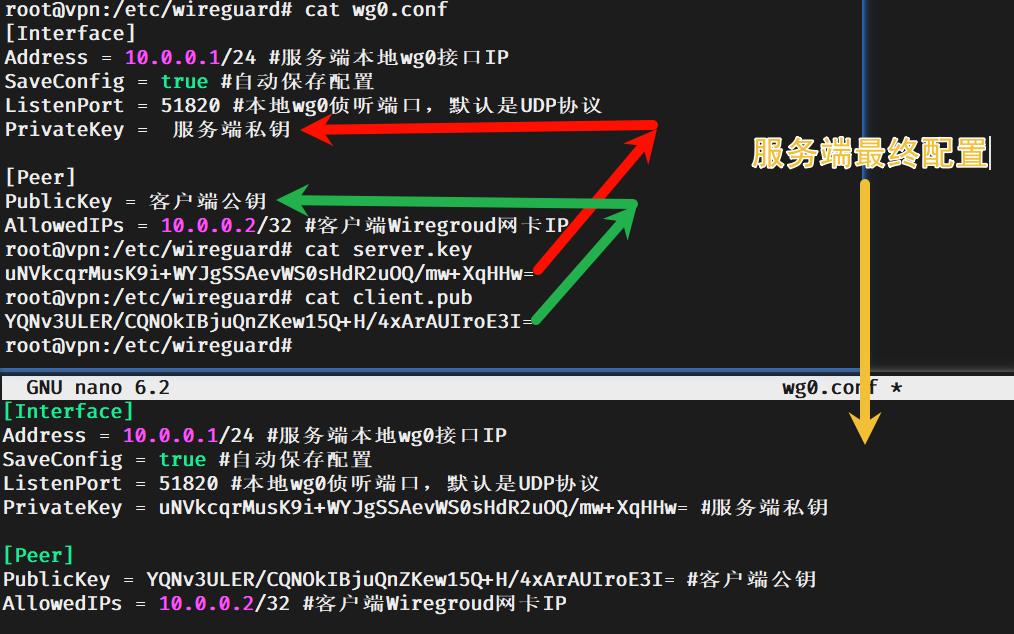
3.8、创建wg0.conf服务端配置文件
nano /etc/wireguard/wg0.conf
[Interface]
Address = 10.0.0.1/24
SaveConfig = true
ListenPort = 51820
PrivateKey = 服务端公钥
[Peer]
PublicKey = 客户端私钥
AllowedIPs = 10.0.0.2/32
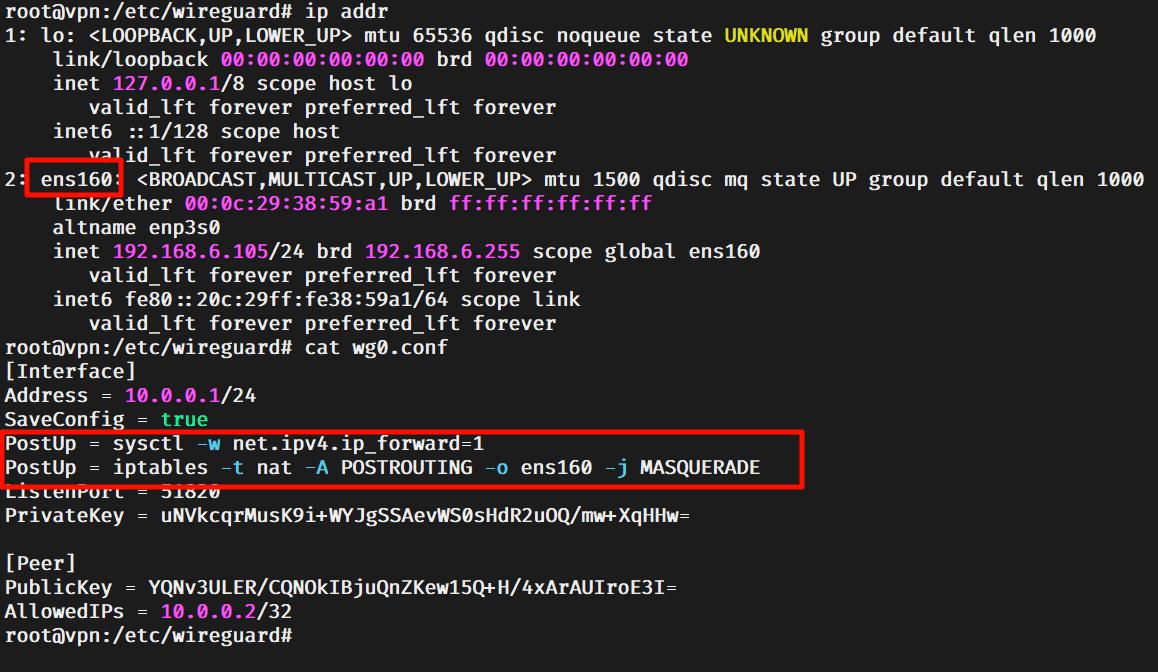
3.9、配置终端上网
ip addr
PostUp = sysctl -w net.ipv4.ip_forward=1
PostUp = iptables -t nat -A POSTROUTING -o ens160 -j MASQUERADE
3.10、启动服务
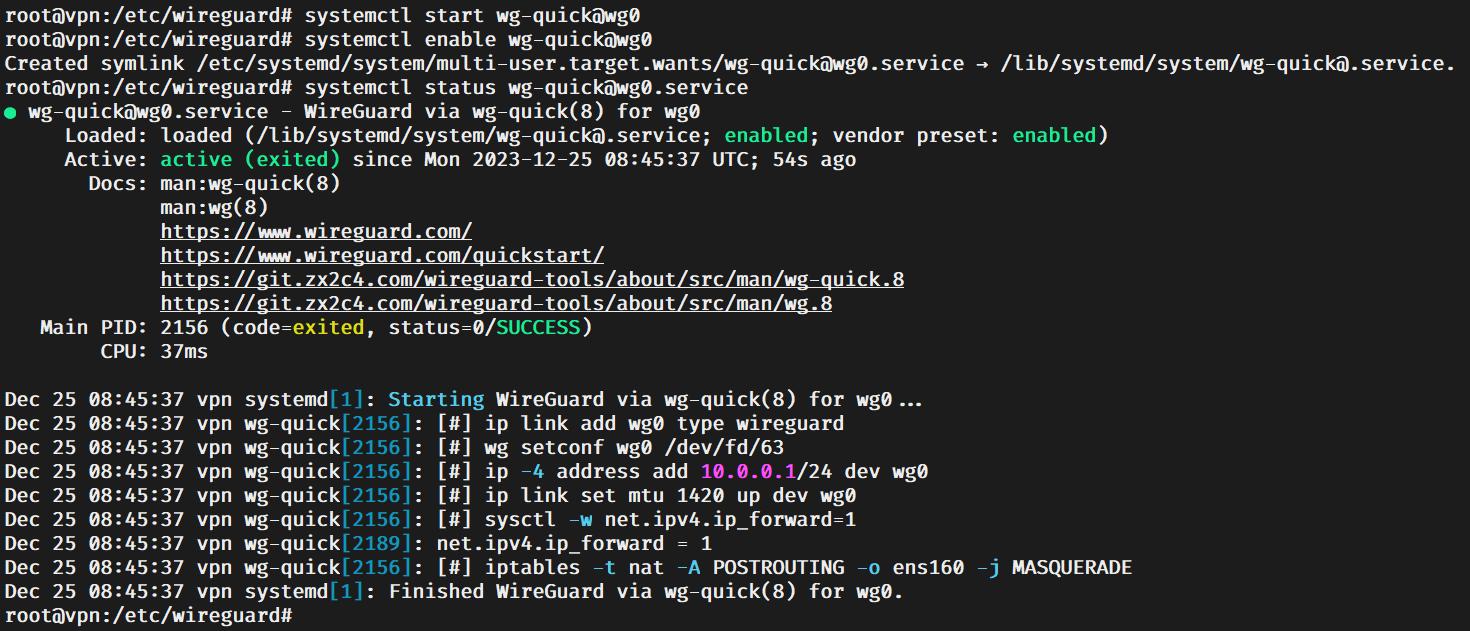
systemctl start wg-quick@wg0
3.11、开机自启
systemctl enable wg-quick@wg0
3.12、状态查看
systemctl status wg-quick@wg0.service
四、客户端配置
4.1、客户端wg0.conf
[Interface]
PrivateKey = 客户端私钥
Address = 10.0.0.2/32
DNS = 192.168.6.190
[Peer]
PublicKey = 服务端公钥
AllowedIPs = 192.168.6.254/32
Endpoint = 192.168.6.105:51820
4.2、新建wg0.txt
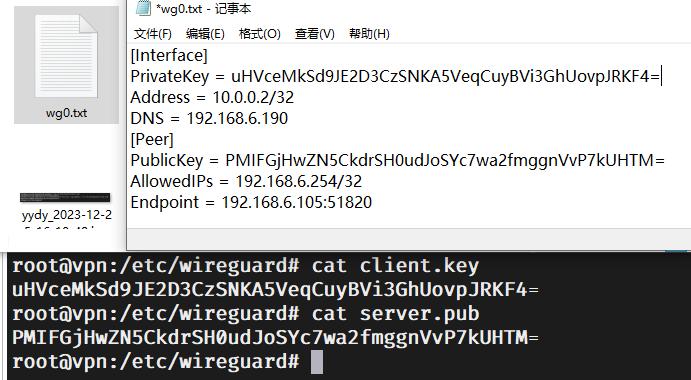
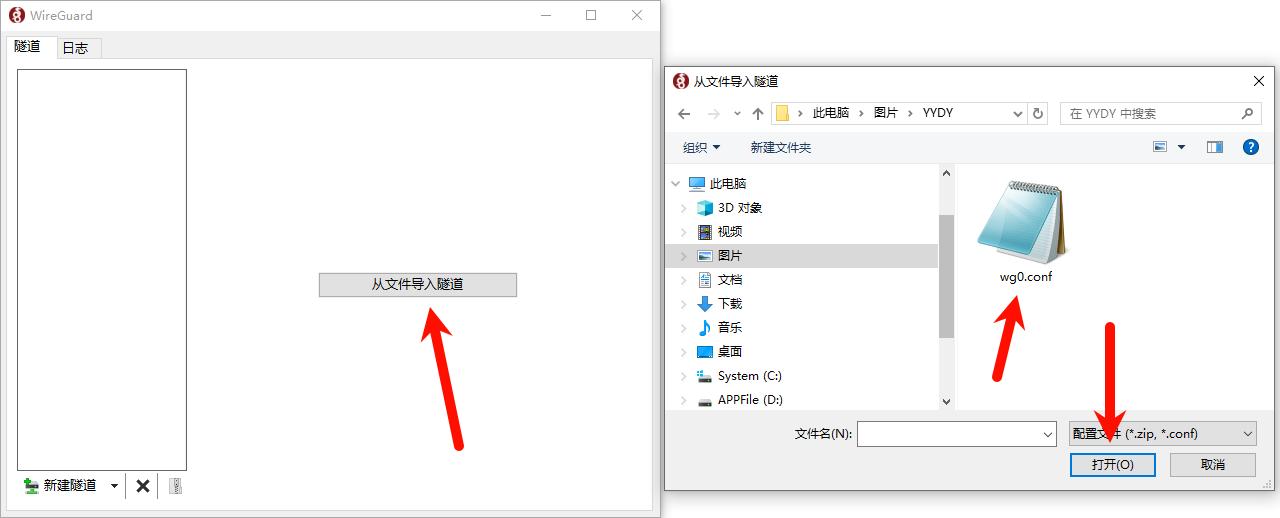
4.3、更改.txt为.conf


五、客户端测试
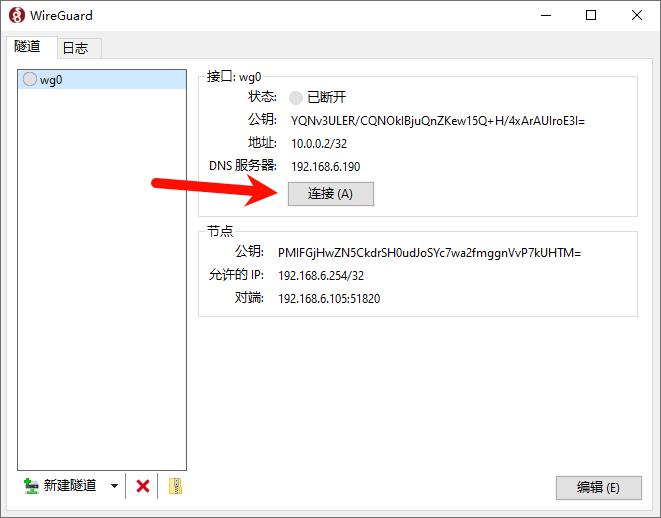
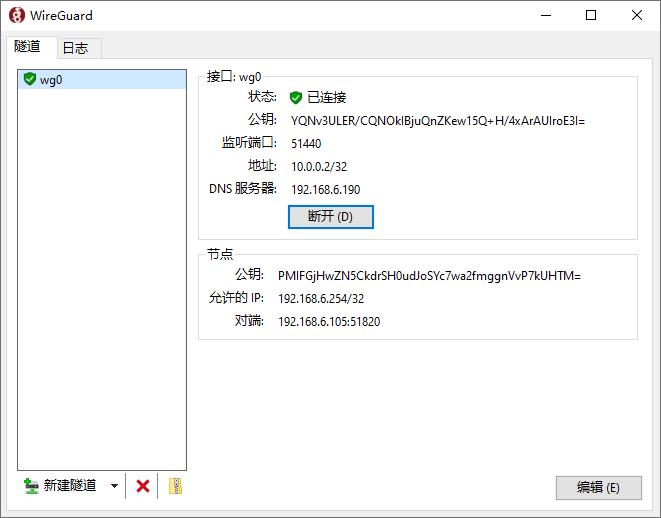

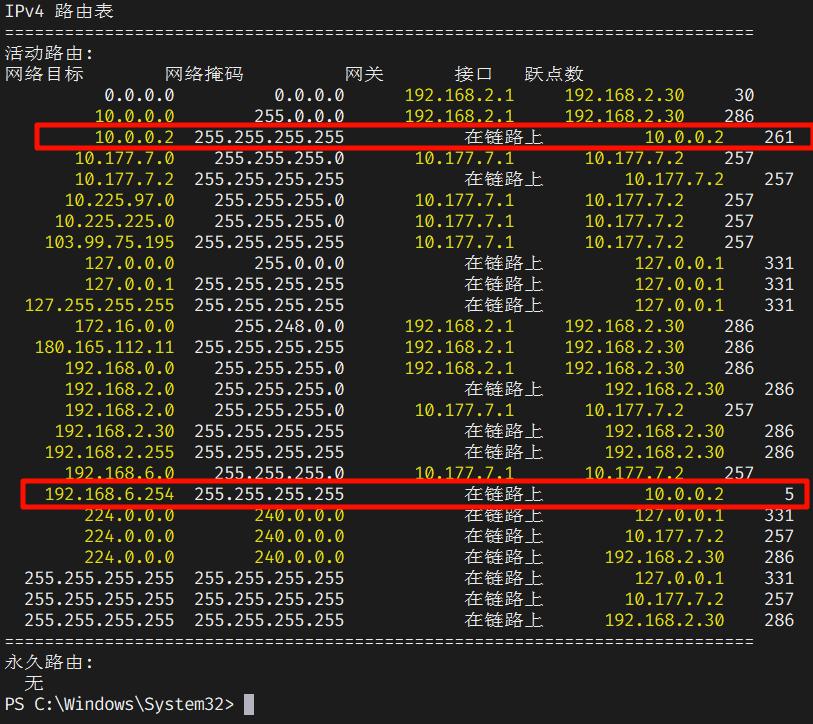
5.1、查看路由
route print -4
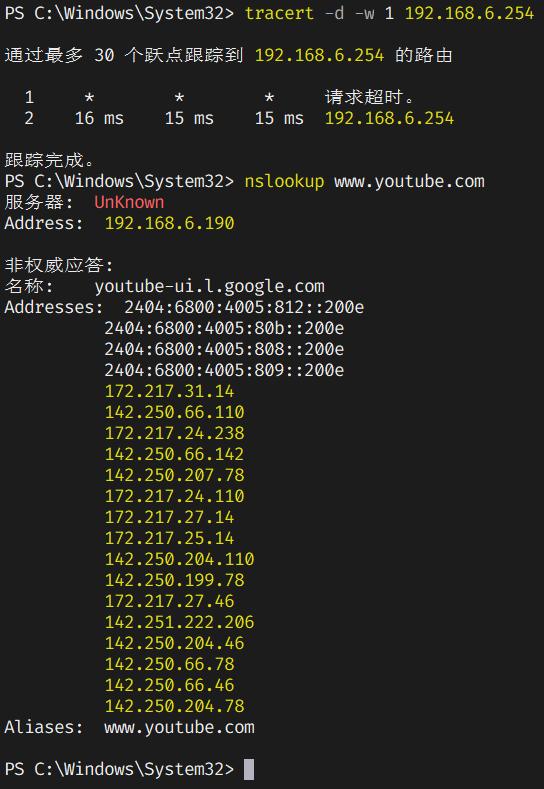
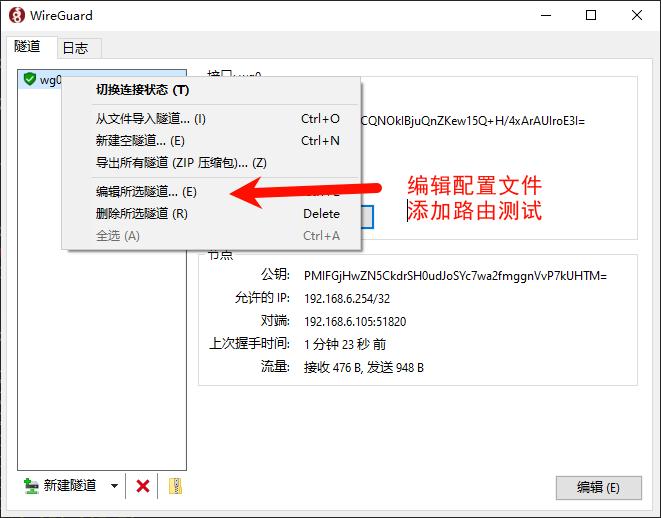
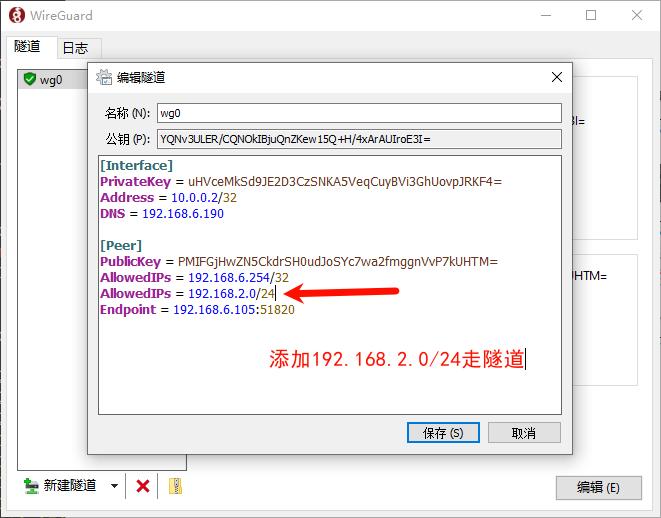
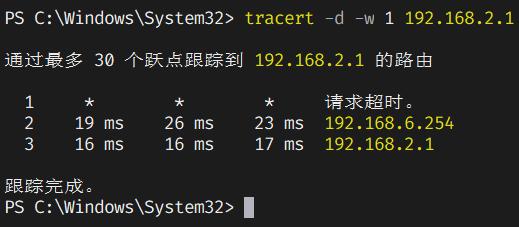
5.2、修改配置文件
六、拓展
