
文章介绍:前面我们有介绍过使用qemu-img在linux中把iso镜像转成各种格式的教程,包括在windows上使用软件:starwindconverter把img镜像转成hyper-v以及vmware支持的格式,今天在介绍一个使用windows软件,通过cmd命令行转换img为多种格式。
一、往期回顾
1.1、img转vhdx
1.2、img转vmdk
1.3、iso 转 qcow2 转 raw | iso 转 vmdk 转 raw
二、本期软件
2.1、qemu-img for Windows

2.2、介绍
QEMU disk image utility for Windows. It is used for converting, creating, and consistency checking of various virtual disk formats. It is compatible with Hyper-V, KVM, VMware, VirtualBox, and Xen virtualization solutions. This build has been optimized for Windows Server (x64).
Usage examples
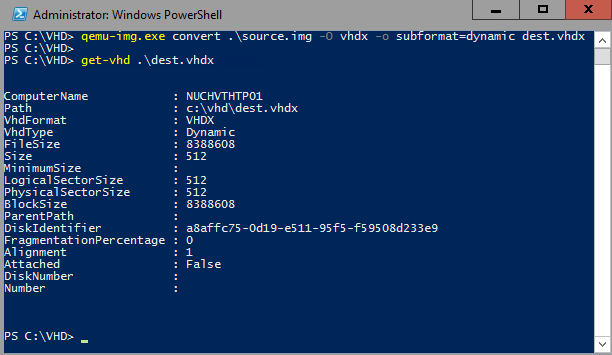
Convert a QCOW2, RAW, VMDK or VDI image to VHDX
| 1 | qemu-img.execonvertsource.img -O vhdx -o subformat=dynamicdest vhdx |
|---|
Convert a QCOW2, RAW, VMDK or VDI image to VHD
| 1 | qemu-img.execonvertsource.img -O vpc -o subformat=dynamicdest vhd |
|---|
Subformat can be either “dynamic” or “fixed” for VHD (vpc) or VHDX.
Note: use the fixed VHD subformat for Azure, the conversion will automatically take care of the required 1MB virtual size alignment.

Check a virtual disk for consistency
| 1 | qemu-img.exechecksource.qcow2 |
|---|
Get info about a virtual disk
| 1 | qemu-img.exeinfoimage.qcow2 |
|---|
Run qemu-img.exe -h or see the manual page for a complete list of all supported options.
2.3、功能
Supported formats
| Image format | Argument for -f and -O options |
|---|---|
| VMDK (VMware) | vmdk |
| QCOW2 (KVM, Xen) | qcow2 |
| VHD (Hyper-V) | vpc |
| VHDX (Hyper-V) | vhdx |
| RAW | raw |
| VDI (VirtualBox) | vdi |
三、获取istoreos镜像
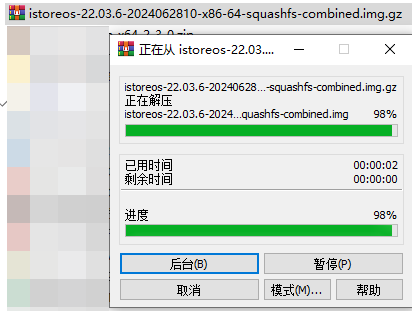
3.1、镜像下载

四、安装qemu-img
4.1、移动qume-img文件至system32
4.2、检查生效
qemu-img --version

五、img转vmdk
qemu-img 支持的 VMDK 子格式各有不同的特点,有如下几种格式:
- monolithicFlat:
- 描述: 将整个磁盘镜像存储为一个单一的平面文件。
- 特点: 占用空间较大,因为它是一个预分配的文件,文件大小与虚拟磁盘的大小相同。
- 优点: 性能较好,因为不需要动态扩展文件。
- twoGbMaxExtentSparse:
- 描述: 将磁盘镜像分割成多个大小不超过 2GB 的稀疏文件。
- 特点: 每个文件按需增长(即稀疏文件),初始大小较小,随着数据写入而扩展。
- 优点: 在某些文件系统中处理大文件时可能更方便,因为每个文件都较小。
- twoGbMaxExtentFlat:
- 描述: 将磁盘镜像分割成多个大小不超过 2GB 的平面文件。
- 特点: 每个文件都是预分配的,文件大小固定为 2GB(最后一个文件可能小于 2GB)。
- 优点: 性能较好,因为每个文件都是预分配的,但与
monolithicFlat相比,管理较大磁盘时更方便,因为每个文件都较小。
5.1、解压istoreos
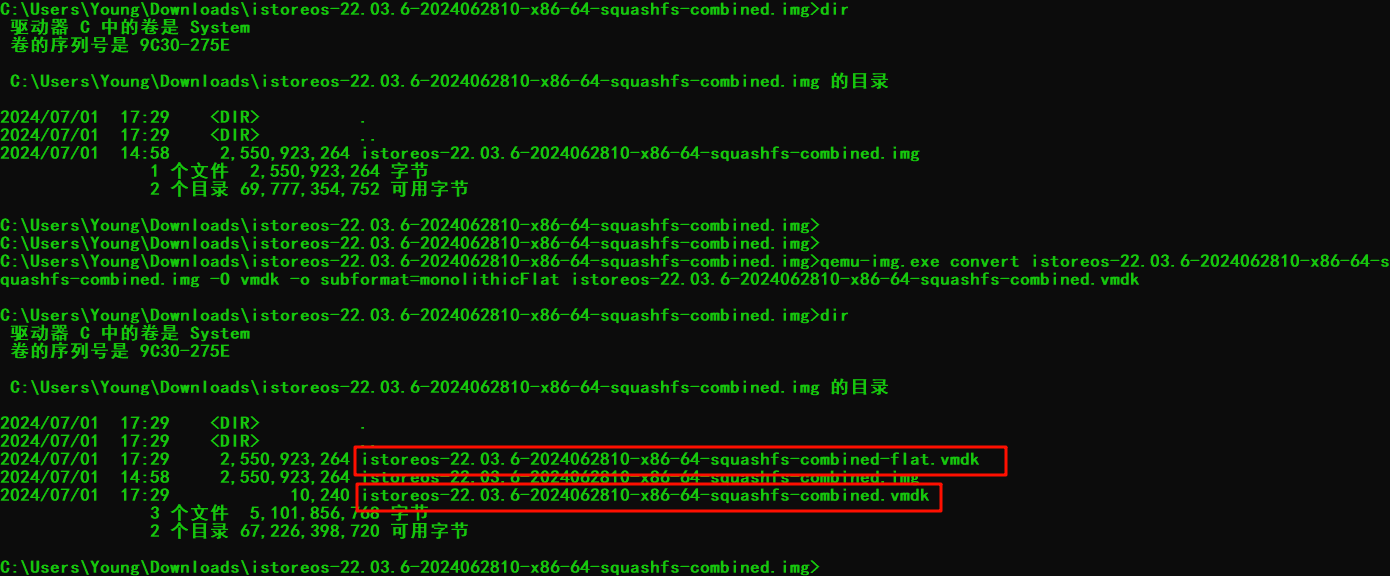
5.2、在.img镜像目录打开cmd

5.3、命令转换
qemu-img.exe convert istoreos-22.03.6-2024062810-x86-64-squashfs-combined.img -O vmdk -o subformat=monolithicFlat istoreos-22.03.6-2024062810-x86-64-squashfs-combined.vmdk
六、ESXi安装iStoreOS
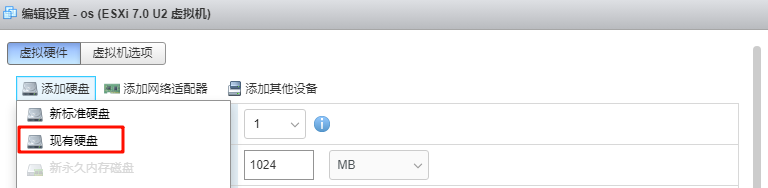
6.1、上传vmdk

6.2、创建虚拟机
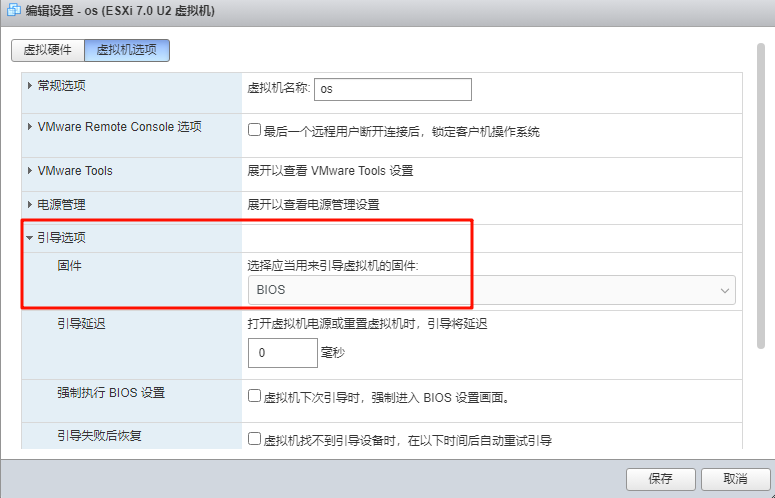
6.3、修改引导
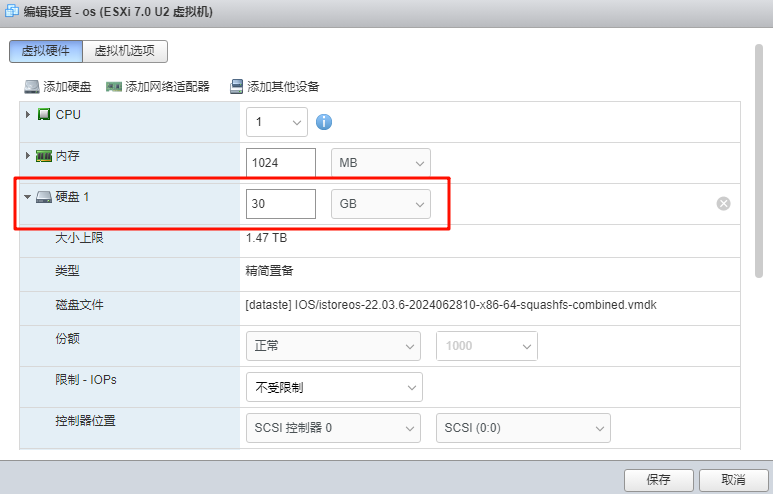
6.4、修改硬盘大小
6.5、启动虚拟机
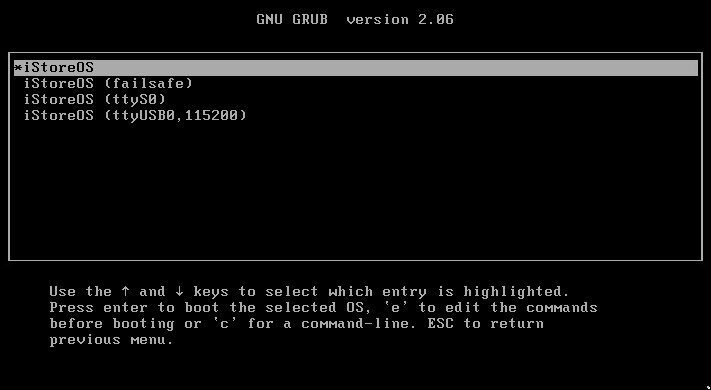
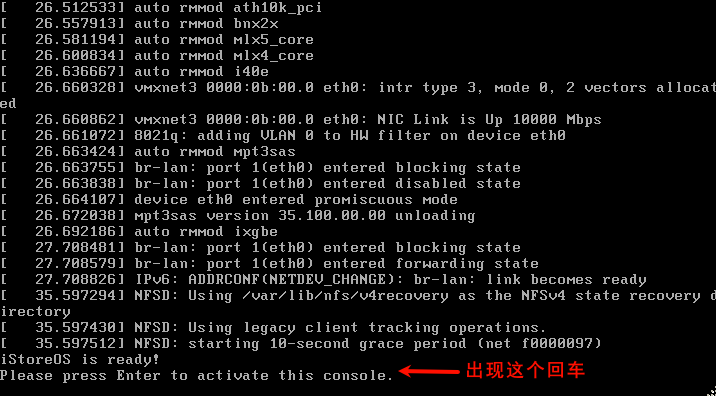
ip addr | grep br-lan


七、img转......
7.1、转换为 VHD (Virtual Hard Disk)
qemu-img convert -O vpc istoreos-22.03.6-2024062810-x86-64-squashfs-combined.img istoreos-22.03.6-2024062810-x86-64-squashfs-combined.vhd
-O vpc:指定输出格式为 VHD(又称 VPC)。- 输出文件名:以
.vhd结尾。
7.2、转换为 QCOW2 (QEMU Copy-On-Write)
qemu-img convert -O qcow2 istoreos-22.03.6-2024062810-x86-64-squashfs-combined.img istoreos-22.03.6-2024062810-x86-64-squashfs-combined.qcow2
-O qcow2:指定输出格式为 QCOW2。- 输出文件名:以
.qcow2结尾。
7.3、转换为 RAW (Raw Disk Image)
qemu-img convert -O raw istoreos-22.03.6-2024062810-x86-64-squashfs-combined.img istoreos-22.03.6-2024062810-x86-64-squashfs-combined.raw
-O raw:指定输出格式为 RAW。- 输出文件名:以
.raw结尾。
7.4、转换为 VHDX (Hyper-V Virtual Hard Disk)
qemu-img convert -O vhdx istoreos-22.03.6-2024062810-x86-64-squashfs-combined.img istoreos-22.03.6-2024062810-x86-64-squashfs-combined.vhdx
-O vhdx:指定输出格式为 VHDX。- 输出文件名:以
.vhdx结尾。
7.5、转换为 VDI (VirtualBox Disk Image)
qemu-img convert -O vdi istoreos-22.03.6-2024062810-x86-64-squashfs-combined.img istoreos-22.03.6-2024062810-x86-64-squashfs-combined.vdi
-O vdi:指定输出格式为 VDI。- 输出文件名:以
.vdi结尾。